There is something deeply moving about holding a physical impression of your pet’s paw. It is a tangible reminder of their size, their shape, and the quiet way they walked through your life. Pet paw print keepsakes capture a moment that would otherwise fade — the exact curve of a toe pad, the width of a paw, the tiny details that make your pet unique.
But not all paw print methods are created equal. Some fade within months. Others crack, crumble, or never quite capture the detail you hoped for. In this guide, we will walk through the most popular methods, discuss which ones actually stand the test of time, and share a step-by-step tutorial so you can create a lasting keepsake at home.
Why Paw Print Keepsakes Are So Meaningful
Pets leave marks on our hearts, but they also leave literal marks on our lives — muddy paw prints on the kitchen floor, scratch marks on the couch, tiny nose prints on the window. A paw print keepsake takes one of those marks and elevates it from a mess to a treasure.
For new pet parents, a paw print is a milestone. It is a way to mark the beginning of a journey, to capture how small those paws were on day one before the dog grew to 80 pounds or the cat filled out into a dignified adult. Looking back at that tiny print years later can feel like looking at a baby photo — you forget just how small they once were.
For those grieving the loss of a pet, a paw print becomes something even more precious. It is a physical connection to a being who is no longer there. Running a finger over the familiar shape of the paw pad can bring comfort in a way that photographs sometimes cannot. It is real. It is them. And it will not fade from memory the way details sometimes do.
Paw print keepsakes also make extraordinary gifts. When you give someone a preserved impression of their pet’s paw, you are not giving a generic present — you are giving them a piece of their own story. It says “your pet matters, and this relationship is worth preserving.” That level of thoughtfulness is rare, and it is never forgotten.
Different Paw Print Methods: Pros and Cons

There are many ways to capture a pet’s paw print, and each method has its own strengths and weaknesses. The right choice depends on your budget, your craft skills, your pet’s temperament, and how long you want the keepsake to last.
Ink Pads and Paper
Ink-based paw printing is one of the simplest and most affordable methods. You press your pet’s paw into a non-toxic ink pad and then onto paper or cardstock. Some kits are designed specifically for pets, with washable, pet-safe ink and wipe-clean materials.
Pros: Inexpensive, fast, requires minimal preparation, captures fine detail when done well. Easy to make multiple copies. Works for all sizes of pets, from tiny hamster paws to large dog paws.
Cons: Ink can smudge if not handled carefully. Paper prints are fragile — they tear, fade in sunlight, and are vulnerable to water damage. Messy if your pet wiggles. Not ideal for pets who lick their paws obsessively, since you need to clean the ink off thoroughly afterward.
Lasting potential: Medium. If you use archival-quality paper and pigment-based ink, and you frame the print behind UV-protective glass, it can last for decades. Cheap ink and regular paper will fade within a few years, especially if displayed in direct sunlight.
Clay Impressions
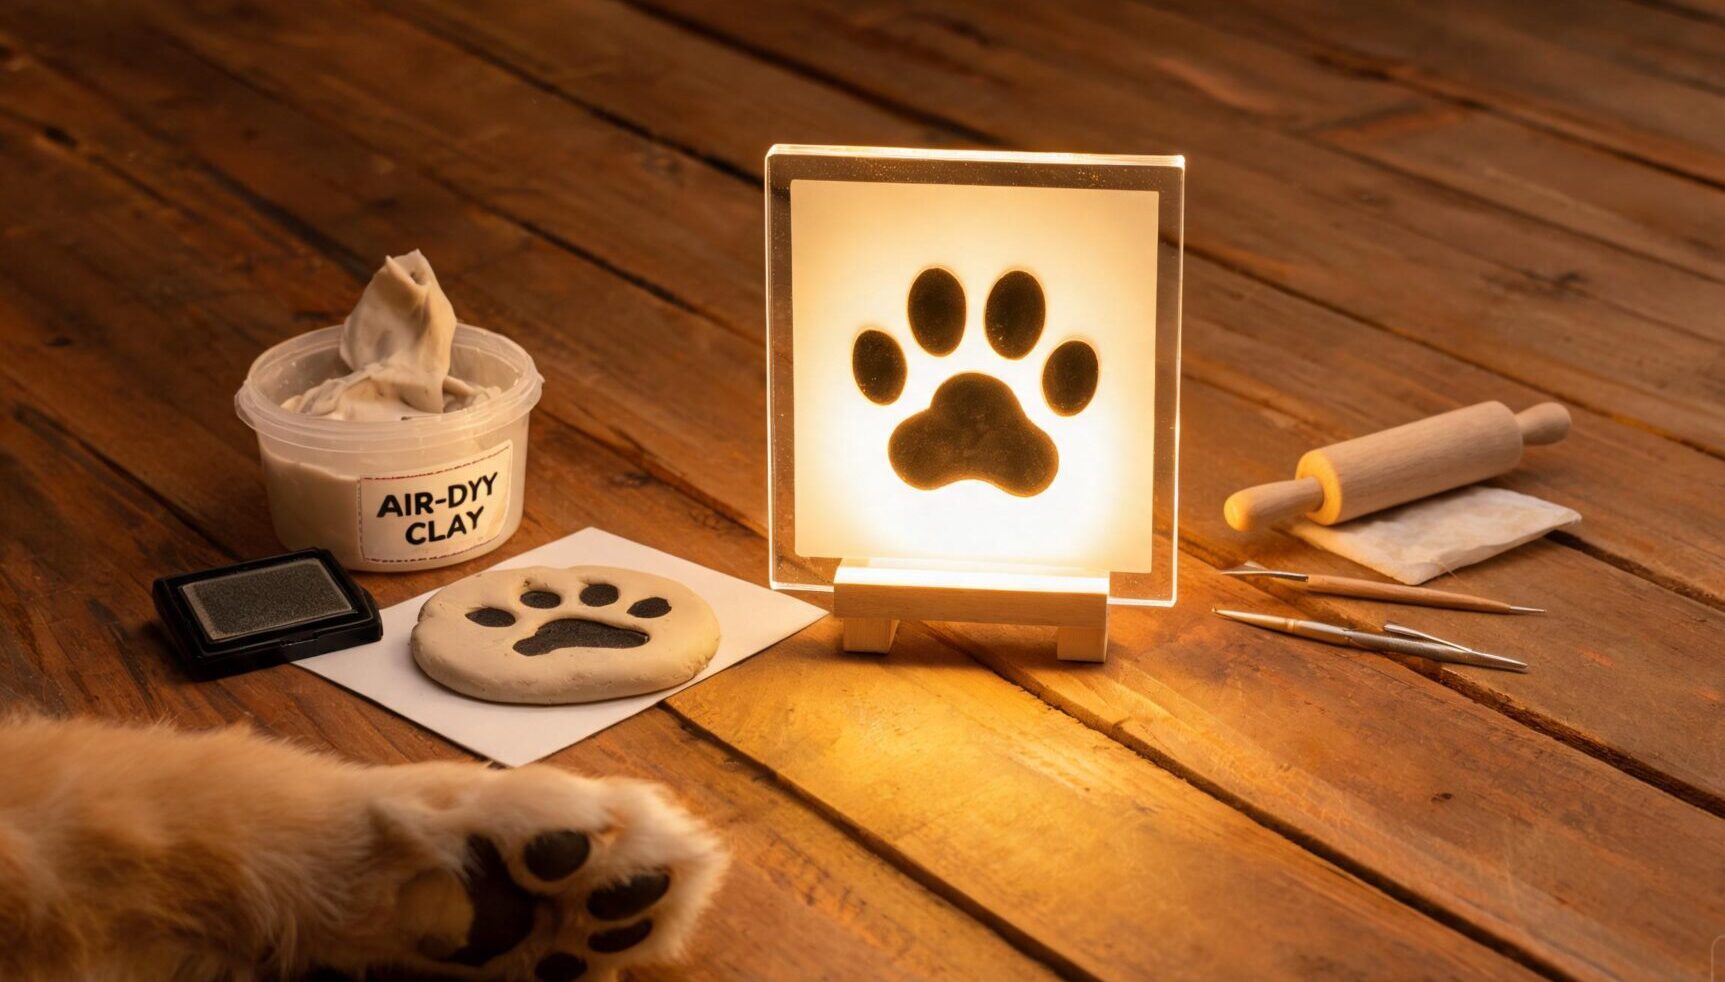
Clay paw print kits use air-dry or oven-bake clay to create a three-dimensional impression of your pet’s paw. The process is satisfyingly tactile — you knead the clay, press the paw in, let it dry, and then you have a solid, tangible keepsake.
Pros: Creates a 3D object that feels substantial. Captures depth and texture in a way that flat prints cannot. Can be painted, sealed, or decorated after drying. No ink or mess on your pet’s fur. Available in many price ranges, from cheap craft store kits to premium ceramic options.
Cons: Air-dry clay can crack over time, especially in humid or dry environments. Getting a clean impression requires a cooperative pet and a steady hand. The clay needs time to dry or cure, which means you cannot finish the project in one sitting. Cheap clay kits may shrink or warp as they dry.
Lasting potential: Good, if sealed properly. A well-made clay impression that is sealed with a clear acrylic sealant and kept indoors can last for many years. Unsealed clay is porous and will absorb moisture, leading to cracking and discoloration. For maximum longevity, look for ceramic or porcelain options that are fired in a kiln.
Salt Dough
Salt dough is a DIY favorite because you can make it with ingredients you probably already have in your kitchen — flour, salt, and water. The texture is similar to clay, and you bake it in the oven to harden it.
Pros: Extremely cheap. Easy to make at home. Safe for pets (though not tasty). The dough is soft and easy to press into, which is great for getting a detailed impression. You can add food coloring or paint it after baking.
Cons: Prone to cracking, especially if not dried slowly. Absorbs moisture from the air — salt dough keepsakes in bathrooms or kitchens may soften or grow mold over time. The texture is porous and can look a bit rough. Not as premium-feeling as other methods.
Lasting potential: Poor to fair. Salt dough is best for temporary or seasonal keepsakes. Even with sealing, it tends to degrade within a few years. It is a fun project to do with kids or for a first attempt, but if you want something that will last a lifetime, you will want to upgrade to a different method.
Digital Scanning and Laser Engraving
Modern technology has made it possible to capture a paw print digitally and then engrave it onto virtually any surface. The process typically involves taking a high-resolution photo or scan of the paw (or of an existing print) and then using software to prepare it for laser engraving, 3D printing, or CNC carving.
Pros: Incredibly precise — captures every tiny ridge and detail. Can be reproduced on almost any material: wood, metal, acrylic, glass, leather. The digital file can be backed up and reused for multiple projects. No mess, no ink, no pressing your pet’s paw into anything. You can even work from an existing ink print or a clear photo of the paw.
Cons: More expensive than DIY methods. Requires access to a laser engraver or a service that provides laser engraving. You need a good quality photo or scan to work from. The result is engraved rather than 3D raised, so it has a different feel than a clay impression.
Lasting potential: Excellent. A laser-engraved paw print on metal, stone, or acrylic will essentially last forever. It will not fade, crack, or degrade. The digital file can also be stored permanently and used to create new keepsakes if the original is ever lost or damaged.
Which Methods Actually Last (and Which Will Disappoint You)

If you are investing time and money into a paw print keepsake, you want it to be there for years — or even decades — to come. Let us be honest about which methods deliver on that promise and which will leave you disappointed.
Most durable: Laser-engraved metal, stone, or acrylic. These materials are essentially impervious to normal wear and tear. A well-made engraved paw print on stainless steel, marble, or cast acrylic will look the same in 50 years as it does today. The Relxday RX17 Custom 3D LED Night Light, for example, uses laser-engraved acrylic to create a paw print design that glows from within — the engraving itself will never fade or wear off.

Very durable: Fired ceramic or porcelain impressions. These go through a kiln at high temperatures, which vitrifies the clay and makes it as durable as a coffee mug. They are water-resistant, scratch-resistant, and built to last. The downside is that you usually need to send a mold or digital file to a professional ceramicist, which adds cost and time.
Moderately durable: Sealed air-dry clay and framed archival ink prints. Both of these can last for decades if cared for properly. The keys are sealing the clay properly (multiple coats of acrylic sealant, including on the bottom) and keeping ink prints out of direct sunlight behind UV-protective glass. If you are willing to do the maintenance, these are good middle-ground options.
Least durable: Salt dough, unsealed clay, and cheap ink on regular paper. These are fine for craft projects or temporary displays, but do not expect them to be heirlooms. Salt dough will eventually absorb moisture and crack. Unsealed clay will discolor and crumble. Cheap ink will fade to almost nothing after a few years in sunlight.
Our advice: if this is a keepsake you want to pass down or keep forever, invest in a method that is built to last. The difference in cost between a $10 salt dough kit and a $50 engraved acrylic piece is significant, but so is the difference in longevity. A keepsake that lasts a lifetime is ultimately better value than one that falls apart in a year.
Step-by-Step DIY Tutorial: Clay Paw Print Keepsake
For those who want a hands-on project, a properly made clay paw print can be a beautiful and long-lasting keepsake. This tutorial uses air-dry clay with proper sealing techniques to maximize durability. Follow these steps carefully, and your keepsake could last for decades.
What You Will Need
- High-quality air-dry clay (look for a brand specifically designed for keepsakes, not children’s crafts)
- Rolling pin or acrylic roller
- Wax paper or parchment paper
- Clean, damp cloth for wiping paws
- Sandpaper (fine grit, 220-400)
- Clear acrylic sealant (matte or glossy, your preference)
- Paint (acrylic, optional — for painting the background or details)
- A small paintbrush
- Ribbon or twine (optional, for hanging)
Step 1: Prepare Your Workspace and Your Pet
Start by clearing a flat, clean work surface. Lay down wax paper to protect the surface and prevent the clay from sticking. Gather all your supplies within reach — you do not want to be searching for something while holding a clay-covered paw.
Next, prepare your pet. Give their paws a quick wipe with a damp cloth to remove any dirt, mud, or loose fur. Trim any long fur between the paw pads if needed — long fur can prevent the clay from making a clean impression. Have treats ready to reward good behavior. If your pet is particularly wiggly, consider doing this right after a walk or play session when they are a bit tired.
Step 2: Prepare the Clay
Knead the clay thoroughly until it is soft and pliable. This is important — cold, stiff clay will not take a good impression and may crack later. If the clay is too dry, you can add a tiny bit of water. If it is too sticky, let it sit out for a few minutes to air dry slightly.
Roll the clay out to a uniform thickness of about 1/4 to 1/3 inch. Thinner than 1/4 inch and it may crack during drying. Thicker than 1/3 inch and it will take much longer to dry and may warp. Use the rolling pin on top of wax paper for easy transfer. Cut the clay into your desired shape — a circle, heart, square, or the shape of a paw print.
Step 3: Make the Impression
This is the moment of truth. Have your pet sit or lie down in a comfortable position. Gently lift their paw and press it firmly — but not too hard — into the clay. Make sure each toe pad and the main paw pad makes contact. Press straight down and lift straight up, without wiggling or twisting.
If the first attempt is not perfect, that is okay. Knead the clay back up, roll it out again, and try once more. Most pets need a few tries before you get a clean impression. Give treats and praise throughout the process so your pet associates it with positive things.
Once you have an impression you are happy with, you can use a toothpick or small tool to write the pet’s name and date around the edge. Do this while the clay is still soft.
Step 4: Dry Slowly and Evenly
Rushing the drying process is the number one cause of cracked clay keepsakes. Air-dry clay needs to dry slowly and evenly from all sides. Place your paw print on a wire rack or a piece of wax paper on a flat surface in a cool, dry area away from direct sunlight and heat sources.
Let it dry for 24 hours, then carefully flip it over and let the bottom dry for another 24 hours. Depending on the thickness and humidity level, it may need 3-7 days to fully cure. You will know it is fully dry when it feels hard and cool to the touch all the way through.
Do not use an oven, microwave, or hairdryer to speed up the process. Rapid drying causes the surface to harden while the inside is still soft, which leads to cracking and warping. Patience is key here.
Step 5: Sand, Paint, and Seal
Once the clay is completely dry, use fine-grit sandpaper to smooth any rough edges or imperfections on the back and sides. Wipe away the dust with a damp cloth and let it dry again.
If you want to add color, now is the time to paint. Acrylic paint works well on air-dry clay. You can paint the whole thing, just the background (leaving the paw print itself natural), or add details like the pet’s name. Let the paint dry completely between coats.
The final and most important step is sealing. Apply 2-3 coats of clear acrylic sealant, letting each coat dry completely before applying the next. Seal the front, the back, and all the edges. This is what protects the clay from moisture and gives it durability. Without a proper sealant, your keepsake will absorb moisture from the air and eventually crack.
Step 6: Display Your Keepsake
Once the final sealant coat is dry, your paw print keepsake is ready to display. You can set it on a shelf, mount it in a shadow box with a photo of your pet, or add a ribbon and hang it on the wall. Keep it out of direct sunlight and away from humid areas like bathrooms to maximize its lifespan.
Creative Ways to Display Paw Print Keepsakes
A paw print keepsake deserves to be seen, not tucked away in a drawer. How you display it depends on the type of keepsake, your decor style, and how prominent you want it to be. Here are some ideas to inspire you.
Shadow box display: This is one of the most popular ways to display paw print keepsakes, and for good reason. A shadow box protects the keepsake from dust and damage while keeping it visible. You can include other mementos alongside the paw print — a photo, a collar tag, a tuft of fur, a favorite toy. It creates a little shrine to your pet that you can look at every day.
Gallery wall integration: If you have a gallery wall of family photos, a framed paw print fits right in. Use the same frame style as your other photos for a cohesive look. It is a subtle way to include your pet in your family photo display without making it the center of attention.
Nightstand glow: For something that provides comfort every night, consider an LED acrylic display. The Relxday RX17 Custom 3D LED Night Light with a paw print design casts a warm, gentle glow that is perfect for a bedroom or hallway. The light catches the engraved details of the paw print, making it visible even in the dark. It is a modern take on the traditional keepsake that serves a practical purpose too.
Jewelry you can carry: For those who want to carry their pet’s paw print with them wherever they go, there are services that can engrave a paw print onto a necklace pendant, a ring, or a bracelet. These are often made from sterling silver or gold, so they are durable enough for daily wear. It is a quiet, personal way to keep your pet close.
Garden stone: If your pet loved spending time outdoors, a paw print garden stone can be a beautiful tribute. You can make one using concrete or purchase a pre-made stone that is engraved with the paw print. Place it in a favorite spot in the garden — maybe near a window where you can see it from inside — and plant some flowers around it. It creates a peaceful place to sit and remember.
Holiday ornament: A paw print ornament for the Christmas tree is a tradition that many pet families love. You can make one from clay each year, documenting how your pet’s paws grow and change. For pets who are no longer with you, hanging their ornament on the tree each year is a gentle way to include them in holiday celebrations.
Gifts for New Pet Parents vs. Memorial Gifts
Paw print keepsakes work beautifully for both joyful occasions and somber ones, but the approach should be different. Here is how to tailor your gift to the situation.
For new pet parents: A paw print kit is a wonderful “welcome home” gift. It gives them a project to do together and a way to mark the beginning of their life with their new pet. Pair the kit with a nice frame or a display stand so they have everything they need. Include a handwritten note encouraging them to do it early — puppies and kittens grow so fast, and having a record of those tiny paws becomes more precious with each passing year. You can also give a pre-made keepsake like an engraved LED night light with the pet’s name, which is ready to display right out of the box.
For memorial gifts: When someone has lost a pet, a paw print keepsake can be incredibly comforting, but it needs to be given with sensitivity. If you can get access to the pet’s paw print (maybe the vet took one, or the owner has an ink print), having it engraved onto a permanent material like acrylic or metal is a beautiful gesture. If you do not have access to the actual paw print, a generic paw print design can still be meaningful — just pair it with the pet’s name and dates. The most important thing is the card that comes with it. Mention the pet by name, share a memory if you have one, and acknowledge that their grief is real. The keepsake is a physical anchor for those feelings.
If you are not sure what would be appropriate, it is always okay to ask. Something like “I would love to make a paw print keepsake in honor of Max — would that be something you would want?” gives the person agency and lets them decide what feels right for them. For more gift inspiration, you can also browse the shop for additional ideas.
Common Mistakes to Avoid
Paw print keepsakes seem simple, but there are plenty of ways they can go wrong. Learning from other people’s mistakes can save you time, money, and frustration.
Blurry prints: The number one complaint is blurry or smudged prints. This usually happens because the pet wiggles, the ink is too wet, or you do not press firmly enough. For ink prints, make sure the paw is clean and dry, use just enough ink to coat the pad evenly, and press straight down and straight up. For clay prints, make sure the clay is at the right temperature (room temperature, not cold) and that you apply firm, even pressure.
Using the wrong materials: Not all clay and ink is created equal. Cheap craft clay cracks. Cheap ink fades. Cheap paper yellows. If you want a keepsake that lasts, invest in quality materials. Look for clay specifically marketed as “keepsake quality” and ink that is labeled “archival” or “pigment-based.” The difference in cost is usually small, but the difference in longevity is enormous.
Not sealing the clay: We already mentioned this, but it bears repeating. Unsealed clay is porous. It will absorb moisture from the air, from spills, and even from being handled. Over time, this leads to discoloration, mold growth, and cracking. A few coats of clear acrylic sealant take five minutes to apply and add years to the life of your keepsake. Do not skip this step.
Rushing the process: Whether it is the clay drying time, the ink drying time, or the sealant curing time, rushing any step usually leads to problems. Give each step the time it needs. If you are making a gift for a specific date, start early — at least a week in advance — so you have time for multiple attempts and proper drying.
Forgetting to clean the paw: Dirt, oil, and loose fur on your pet’s paw will prevent a clean impression. A quick wipe with a damp cloth takes 30 seconds and makes a huge difference in the quality of the final print. For long-haired breeds, you may also want to trim the fur between the paw pads carefully.
Not making extras: Especially with ink prints, it is smart to make several copies. You can frame the best one and store the others in a safe place as backups. If anything happens to the original, you will be grateful you have duplicates. For clay keepsakes, consider making two — one to display and one to store as a backup.
Frequently Asked Questions
How do I get my dog or cat to cooperate for a paw print?
The key is to make it a positive experience. Start by letting your pet sniff and investigate the materials. Give plenty of treats and praise throughout the process. If your pet seems stressed, stop and try again later — forcing it will only make it harder next time. Timing helps too: try right after a meal or a walk when your pet is relaxed and a bit tired. For cats, you may have the most success while they are sleepy or curled up on your lap. Keep sessions short — no more than a few minutes — and end on a positive note, even if you did not get the perfect print.
Can I make a paw print keepsake from an existing photo of my pet’s paw?
Yes, absolutely. If your pet has already passed away or if you simply cannot get a good in-person impression, you can work from a photograph. You will need a clear, well-lit photo taken from directly above the paw with something for scale (like a coin) in the frame. Many laser engraving services can trace the outline of the paw from a photo and create an engraved keepsake. The level of detail may not be quite as precise as a direct impression, but it is still a meaningful way to preserve the memory. This is also a great option if you want to create a gift for someone and do not have access to their pet.
How long do clay paw print keepsakes really last?
It depends almost entirely on the quality of the clay and whether it is properly sealed. A cheap craft store clay kit that is not sealed may start cracking and crumbling within a year or two. A high-quality air-dry clay with multiple coats of acrylic sealant, kept indoors in a temperature-controlled environment, can last for 20 years or more. Fired ceramic or porcelain paw prints are essentially permanent — they will last as long as any other ceramic object, which is to say hundreds or thousands of years if not dropped. For maximum longevity with minimal maintenance, consider laser-engraved acrylic or metal instead.
Are ink paw print kits safe for pets?
Most pet-specific ink pad kits are non-toxic and safe, but you should always check the label. Look for products that are explicitly labeled “pet safe” or “non-toxic” and designed for use on paws. Avoid using regular human stamp pads — they may contain chemicals that are not safe if ingested, and some pets will lick their paws after printing. After making the print, clean your pet’s paw thoroughly with a damp cloth or pet-safe wipe. If your pet has sensitive skin or open wounds on their paws, skip the ink method and try clay or a digital approach instead.
What is the best paw print method for a very small pet?
For tiny pets like kittens, puppies, hamsters, guinea pigs, or rabbits, ink on paper is often the best choice because it captures the fine details of very small paws. Clay can work too, but you need to be very gentle to avoid squishing the tiny toes. Some pet supply companies sell extra-small ink pads specifically for tiny paws. Another option is to use a digital scanner or a high-resolution macro photo, which can capture amazing detail at any size. The most important thing with small pets is to be gentle and patient — their tiny paws are delicate, and they may be easily frightened.
How much does a professional paw print keepsake cost?
Prices range widely depending on the material and complexity. A basic laser-engraved keychain or small plaque might cost $15-$30. A larger engraved acrylic night light with custom text usually ranges from $15-$50. A custom ceramic or porcelain paw print impression, where you send a mold and they fire it in a kiln, can cost $50-$150 depending on size and finish. High-end options like sterling silver jewelry with a custom paw print engraving can cost $100-$300 or more. In general, laser-engraved acrylic offers the best balance of durability, detail, and affordability for most people.